Git
This page contains the instructions how to use Git for working with open BlackBox Component Builder GitHub repository in Windows.
1. Download and install Git client with default preferences. http://git-scm.com/download/win
2. Run "Git Gui" and add your name and email in Edit/Options...
3.To make some new project and work with it locally (for experiments and education)
3.1. Move folder with a project to some place, that does not require administrator rights for creation of new folders and files (for example, home directory or desktop)
3.1. Go to folder run pop-up menu at some empty space and choose Init Here.
The hidden folder ".git" will be created, it will contain all data about repository (do not remove this folder)
3.3. For adding all files from folder to project run pop-up menu and choose "Git Add all files now".
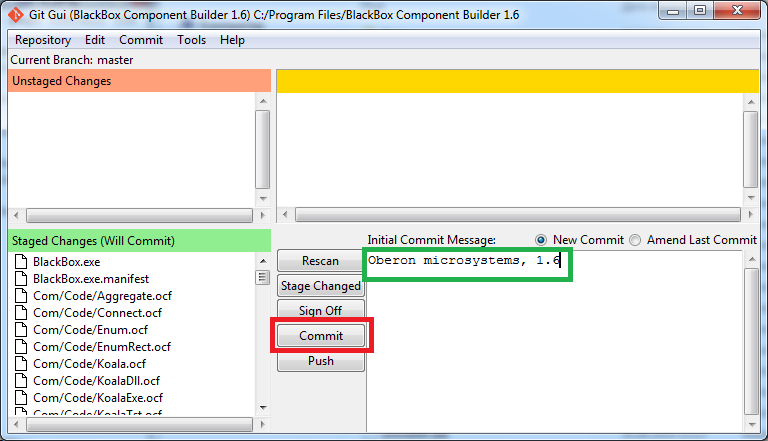
3.4. For fixation of project state use "Git Commit Tool". (If all files in red-titled area, push "Rescan" and they will move to green-titled area). Write some comment message and push "Commit" button.
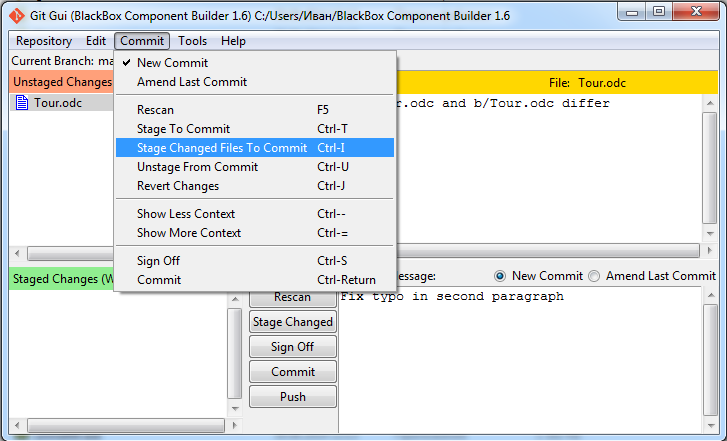
3.5 Now you can change some code, stage changed files for commit (image bellow) and commit new changes (see 3.4).
3.6 Finally you will have the project history ("Git History" in pop-up menu) with the ability to restore any project state or make the new branch for experiments.
4.1. Register at http://github.com
4.2. Make ssh-key on your PC.
4.2.1. Open "Git Bash"
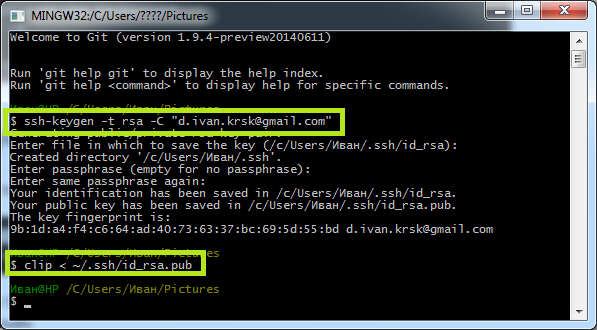
4.2.2. Make ssh-key with command: ssh-keygen -t rsa -C "your_email@example.com" press Enter several times until the process will not finish generation.
4.2.3. Copy new key to clipboard with command: clip < ~/.ssh/id_rsa.pub
4.2.4. Close Git Bash
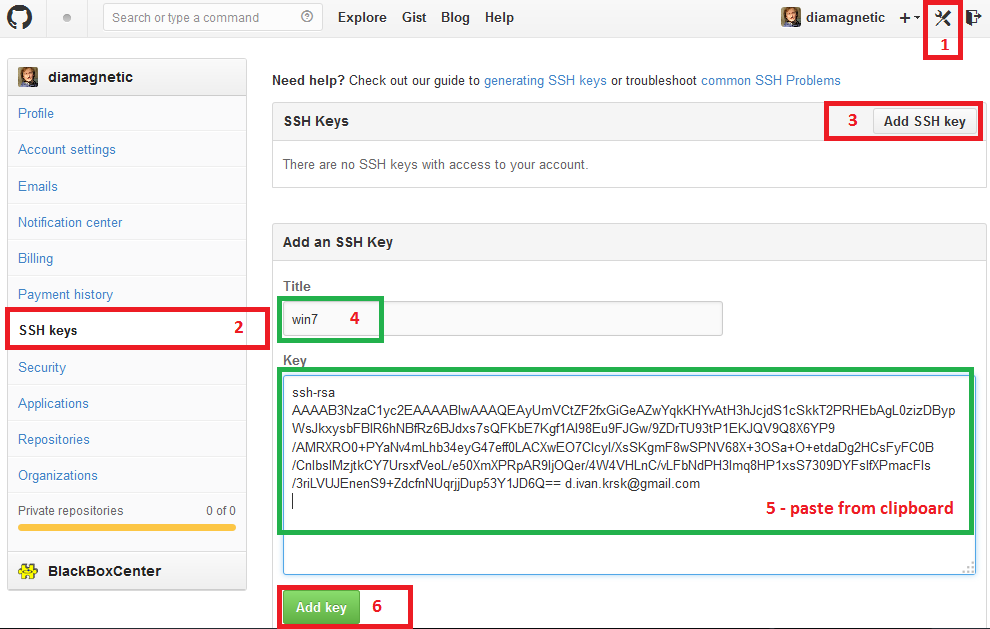
4.3. Add SSH key to GitHub following numbers in next image

4.4. Add remote repository and fetch the last stage


